- Main
- BC
- Origin
- For the Barrel
Amuro Ray (アムロ・レイ Amuro Rei?) is the protagonist of the Mobile Suit Gundam: The Origin, Mobile Suit Gundam: The Origin - On the Eve and Mobile Suit Gundam: The Origin - Amuro 0082 manga who also appears in the Mobile Suit Gundam: The Origin OVA. The son of Tem Ray, he piloted the Earth Federation's RX-78-02 Gundam throughout the One Year War.
History[]
U.C. 0071[]


At a spaceport on Earth, a flight to Side 5 Loum was about to begin boarding. Amuro's Haro, was rolling on the spaceport floor, disturbing a couple of passengers, but he managed to catch it but Haro kept on saying "Let me go". Some passengers laughed before Amuro put Haro (now wanting to share profiles with Amuro) back in the box that marketed Haro as a "Lovely Mascot Robot". Crying "wait for me, dad", Amuro caught up with Tem Ray, who told Amuro to quit toddling and not to open the Haro box until later. At the AirUNA check-in for first class passengers, Sayla Mass was with her adoptive father, Don Teabolo Mass and brother Édouard Mass. She had noticed Amuro and his Haro and explained to the wheelchair-confined Don Teabolo that she saw a boy chasing his big toy, Don Teabolo laughed and supposed that Amuro wanted the toy very well [1][2].
U.C. 0077[]
At the age of 13, Amuro and his dad were emigrating to the unfinished colony of Side 7 being constructed by Yashima Heavy Industrial. They arrived on the company's shuttle, passing the Luna II asteroid [3].
U.C. 0078[]
While cleaning out his house, Amuro would accidentally enter his father's workroom to find the secret plans for the RX-78-02 Gundam. Enthralled by the idea, Amuro would spend a significant amount of time reading and learning about the Gundam. His curiosity would eventually reach its when he and a group of classmates would attempt to sneak into the local Federation base to try and find the secret weapon. The group were caught in the act, but Amuro escaped punishment thanks to his father's name.
Despite this failure, Amuro once again visited the facility; lying that he was on errands sent by his father. Seeing through this, the receptionist directed Amuro to a meeting room with one of the base's officers, who sternly warned him to let the matter rest. Dejected after his second failure, Amuro simply returned home only to find that his father's workroom had been emptied out by the military during his absence.
One Year War (U.C. 0079)[]
Piloting the Gundam[]
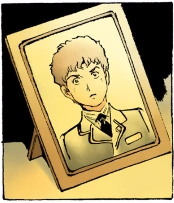
When the young Bright Noa entered Dr. Ray's room, he noticed a photo of Amuro. At that moment, Dr. Ray had remembered news he heard that children as young as the 15-year-old Amuro were being drafted and considered it terrifying, he stated that once they start mass-producing Gundams, the war would be over, and they could put an end to it without wasting young lives [4].
Amuro had initially attempted to flee to a safe zone with Fraw Bow after a small team of Zakus had infiltrated the colony. After splitting up with Fraw, Amuro finds his father and is outraged to see him taking priority of the Gundam over the lives of refugees. In response, Tem orders Amuro to head for the warship at the port. On the way Amuro, the soldiers of the Gundam's transport are killed, and he is nearly crushed by the machine gun shells of the Zakus.
He is later found by Fraw, but the fighting soon reaches the refugees, and kills several civilians, including Fraw's family. As Amuro urges the distraught Fraw to continue fleeing, while he takes matters into his own hands by jumping into the Gundam's cockpit. Engaging the Zakus, Amuro successfully destroys one of his targets with the Gundam's beam saber, but the Zaku's explosion blows a hole in the colony.
Amuro is nearly sucked out by the vacuum while a second Zaku attempts to attack him, but Amuro's quick thinking allows him to escape whilst dispatching the Zaku. Seeing the change in development, Char Aznable orders his ship to begin firing at Side 7's spaceport. Amuro is later contacted by Bright Noa and the rest of the equally surprised crew of the White Base, revealing how he had managed to down a pair of Zakus already.
Upon reaching the White Base, the Gundam is recharged and given a new beam rifle before Amuro departs to engage the new Zaku team tailing the White Base. To the sickly Captain Paolo's shock, Char is the one leading the attack, and he quickly orders Bright and the others to turn around and flee. Still confident because he had just defeated two Zakus, Amuro engaged Char anyway and was repeatedly pelted and hit by the more experienced pilot. Despite this, he still found an opportunity to fire the beam rifle and destroy a third Zaku.
With the Gundam itself running low on power, Amuro is forced to withdraw, though Char, now left alone, also retreated. Upon returning back, Amuro finally meets Captain Paolo but is promptly scolded by Bright for the poor use of the Gundam. Having no fear, Bright tells Amuro that he's free to hate him, so long as he can get the job done in the process. Amuro laters helps Omar Fang in repairing the Gundam. In the next operation, Bright announces the plan to attack Char before his ship can resupply following their previous battle. Amuro immediately refuses to go out with the Gundam, citing both repairs and its status as a secret prototype as his reasons.
Even without him, the mission is a success, but their sudden fighting causes them to be detained by the nearby Magellan. While docked at Luna II, Amuro begins having glimpses of his future in fighting Char. Realizing what was about to happen, Amuro immediately attempts to ride the Gundam claiming that Char was coming.
True to Amuro's prediction, a task force led by Char had infiltrated Luna II and was now attacking the base from within. Amuro reaches the Gundam only to find Sayla fighting Char outside the cockpit. He is quickly downed by Char, but nearby soldiers arrive and force Char to pull back. Upon learning that Captain Paolo had passed away in the fighting, Amuro finally began steeling himself for actual combat.
Having finally resupplied and gaining a new Zaku team, Char once again departed to engage the White Base, forcing Amuro to meet him. Before leaving, Amuro briefly inquires if Sayla has recovered from her wounds from fighting Char. Due to several civilian escape shuttles being launched for Earth, Amuro faces the Zakus near Earth's atmosphere. Thanks to the Salamis's escape shuttle boarding the White Base's dock as well as fighting Char once again, Amuro is unable to return to the White Base and begins getting sucked in by Earth's gravity.
After much stress, Amuro is barely able to clear atmospheric entry and regroups with the White Base in its descent to Earth.
War on Earth[]
En route to Jaburo, the White Base is soon attacked by Garma Zabi's fleet, having joined Char in his attack on the ship. Without any help coming from Jaburo, Amuro is ordered to rush out and help, but the fatigue causes him to flatly reject the order. In response, Bright personally enters Amuro's quarters and hits him calling him a waste of talent for being so petty. As even Fraw is spurred to take action, Amuro finally departs on the Gundam and helps his allies, successfully destroying several Zeon jets and even forcing Garma to retreat. As soon as he returns, however, Amuro quickly retreats to his room to rest.
Feeling guilty at getting preferential treatment for being the Gundam's pilot, Amuro eventually rests within the Gundam as the refugees inside the White Base threaten to riot after suffering from much starvation and fatigue from the constant battles. In response, a temporary ceasefire is made between the White Base and Garma as the refugees are ferried out by plane.
Fearing a potential attack by Char, the transport plane's engine soon fails, and the civilians are forced to move on foot as Amuro rushes out to meet Char's team once again. Eventually rejoining the White Base, Amuro fights Char until night before he retreats once more.
The next day, they are met by Matilda Ajan, who gives the White Base support from the Medea, but orders the ship to maintain its status quo, much to bewilderment of Amuro and the rest of the crew. He is later thanked personally by Matilda for his piloting.
With a quick reprieve finally being given, Amuro takes the opportunity to search for his mother, only to find his old hometown in disrepair and his former house now being used by a group of drunk Zeon soldiers. Amuro is later recognized by one of the locals, who directs him to the nearby refugee camp, where he reunites with his mother.
Their reunion is cut short when a group of Zeon soldiers arrive to patrol the camp, and Amuro is eventually spotted and is forced to fire his gun at the soldiers. This new violent streak frightens his mother, but Amuro justifies his actions due to the war. Fleeing back to the White Base, Amuro is met by Kai and Sayla on the way back, and he boards their humvee before his jeep is destroyed. After the skirmish, Amuro is met by his mother before returning to the White Base, where he simply replies to her that he only wished to protect his friends aboard the ship. He later wishes his mother well before the White Base departs once again.
Spotted by Garma's sentries, the White Base is attacked once more by the Zeon forces, and Amuro leaves to fight Char's ground troops. The battle eventually goes to the White Base when Garma's Gaw is blind-sided and is destroyed in Garma's failed effort to crash his ship into the White Base.
Encounter with Ramba Ral[]
Following Garma's defeat, the White Base's travels would soon meet Ramba Ral, and his Gouf. Amuro is surprised by the new unit, and loses his beam rifle to the Gouf's whip but is rescued by reinforcements from the White Base. Upon return, he watches a brief portion of Gihren Zabi's speech during Garma's state funeral. After this, Amuro begins studying the Gouf's weapons and movements in earnest.
Despite his research, Amuro was once again defeat by Ramba, who used a smoke bomb and the Gouf's whip to destroy the Gundam's leg. Before a finishing blow could be struck, one of Ramba's team members was killed, forcing him to pull back. When one of the Zakus attempted to take the Gundam back, Amuro is rescued by Kai. His second consecutive defeat hurts Amuro as he researches the Gouf once again. After overhearing Bright and Mirai talk about giving him a break, Amuro quickly takes the Gundam and leaves the White Base.
Reaching a nearby town, Amuro rests in a bar and is quickly joined by Ramba and Crowley Hamon. Although uneasy with sharing the bar with Ramba, Crowley and their soldiers, Amuro is given a drink by Crowley as she had also taken quick notice of his change in behavior. Despite this, Amuro catches on and attempts to politely reject Crowley and Ramba's offer. While they converse, Fraw, who had attempted to search for Amuro, was caught and brought before Ramba. Impressed with Amuro's bravery and spirit, Ramba allows the pair to leave. Amuro later splits with Fraw as she returns back to the White Base.
While returning to the Gundam, Amuro sees the Gouf and several Zakus taking Fraw's path. Realizing she had been followed, Amuro boards the Gundam and quickly returns to confront the Gouf. The pair would duel once again, with Amuro finally trading evenly against the Gouf. When both pilots damage the other's cockpit, both Amuro and Ramba are shocked to learn their foe's identity. Despite the Gouf being destroyed eventually, Ramba escapes, citing Amuro's victory to his suit rather than his piloting skills.
Amuro is later detained by Bright for desertion. To his surprise, Sayla was directed to a nearby cell. While asleep, Amuro and Sayla soon get a sudden sensation and realize that the Zeon forces were coming once more. Amuro is quickly released from his cell. While making his way to the Gundam, he is rescued by Bright and is informed of the situation. To his shock, Ramba jumps off a hole from the White Base and kills himself by triggering a grenade he carried. Amuro then contacts Hamon and tells her of Ramba's death, before forcing her to flee.
Following Ramba's defeat, the White Base regrouped with Lt. Matilda's forces and were now met by the Black Tri-Stars. While the crew visit a neutral town for supplies, Hayato gets into a fight with some Zeon soldiers, earning them the attention of all three Tri-Stars. Despite making their identities known, the Tri-Stars' leader, Gaia departs peacefully, warning them that a battle would be different from a street brawl. Ryu later reveals to the crew that the Tri-Stars were responsible for capturing Admiral Revil at Loum. Not long after, the group find themselves under attack by the vengeful Crowley. Realizing that her ship was about to ram the White Base, Amuro, Kai and Hayato quickly used their units to try and stop it, but Crowley soon attempted to fire at them from behind with her plane. In a surprise turn, a Core Fighter would crash itself on Crowley's plane, allowing the trio to safely push her ship off a cliff. At the end of the battle, Amuro is left in disbelief as Sayla informs him that Ryu was the one that piloted the Core Fighter.
During Ryu's eulogy, Amuro gets into a fight with Hayato when he complains that all his crying would not bring Ryu back.
Matilda's Death and Battles Over Sea[]
After Ryu's death, the White Base soon found itself under attack once more, now by the Black Tri-Stars and their Doms. Hayato was eventually forced to eject when his Guntank is destroyed, as Amuro is forced to engage the Tri-Stars alone. While he foils their combination attack and kills Mash, their fight attracts Matilda's attention and she attempts to ram one of the Doms. Unfortunately, the Dom climbs to the Medea's bridge and destroys it, causing it to crash. Amuro is particularly heartbroken by Matilda's death.
Upon finally reaching Jaburo, Amuro is met by Matilda's fiancé, Woody Malden, who urges Amuro not to feel guilty over Matilda's death. Amuro would later undergo several experiments, though during one of these experiments, Amuro quickly saw visions of his mother, Ryu and Matilda. While being given promotions for their service, Amuro finds the posthumous promotion of Ryu to be insulting. He is later visited by Sayla after he is hit for his remark, and she urges Amuro to stop taking the drugs he is given as well as to stop running the tests he was undergoing.
While the Gundam is now being integrated with the Core Block System, Amuro is warned by the White Base's orphans of a Zeon operation occurring inside Jaburo. As the Gundam was not available, Amuro took one of the base's GM's to defend it. He would meet Char once again, now using his custom Z'Gok to attack the base. Before Char can finish Amuro, he is rescued by Woody, who shoots Char from behind. In response, Char quickly destroys Woody's plane, but Amuro destroys the Z'Gok, forcing Char to escape. Amuro later mourns Woody before reporting that Char had returned.
Following several battles and with the White Base finally receiving new crew members, Kai departs from the ship, much to Amuro's disappointment. Soon after Kai's departure, an amphibious assault from Zeon would arrive, and Amuro was unable to use the Gundam as it was still in maintenance. Due to the assault, Kai was eventually forced to return, and he would assist the others in helping the White Base. Bright would later announce the ship's orders to move for Gibraltar.
Suffering another attack, Amuro boards the Gundam to fight units underwater by grabbing hold of the Grublo as it descends underwater. Although the Gundam loses a leg, Amuro breaches the Grublo's hull with the beam saber. After finally surfacing with the defeated Grublo, Amuro only hears Kai's frantic pleas for Miharu Ratokie to return. Upon returning to the White Base, Amuro admits that he had seen Kai sneak a girl onboard, but did not blurt it out.
With Gibraltar secure, Sayla would later become the Core Fighter's pilot while Frau would take over Sayla's duties as navigator. Falling asleep while thinking of the ones killed in the conflict, Amuro is woken by a distress call stating that Char had downed Sleggar Law's team. Confronting Char once again, the two fight on a mountain top, and Amuro briefly hears Char asking him if he was a Newtype. Eventually, Amuro defeats Char's Zaku, and Char flees back to a plane.
After their recent battle, Sayla departs on the Core Fighter to engage the Zeon forces but is shot down and finds herself in the middle of several Doms, led by the remainder of the Black Tri-Stars. Amuro quickly departs with Sleggar's Core Booster to rescue Sayla. When the Gundam lands, they are spotted by the Doms who attack Sayla's Core Fighter and destroy it. Despite this, Amuro single-handedly dispatches the entire Dom squadron, also downing both Tri-Stars in the process.
Amuro developed a fever shortly before Zeon's attempt to finally finish Admiral Revil at Odessa. Realizing that battle had now begun, Amuro boards the Gundam once again. While still groggy, Amuro departs, but senses something terribly wrong. Rather than follow orders, Amuro quickly flies off-course and finds a bomber targeting Revil's ship. Slicing through the missiles the bomber launched, Amuro is able to save the battle, while also capturing Judock, who was the mole in the Federation ranks.
Return to Space[]
With the tide of the war shifting to the Federation's favor, Amuro and the White Base return to space, where they are met by Char's Musai-class, Falmer. Amuro downs several Doms during the skirmish, and he is able to finally sink the Falmer with a beam rifle shot from above. Visiting the neutral Side 6 for supplies, Amuro briefly sees his father while shopping. After finally catching up, Tem only asks for the state of the Gundam before asking Amuro to follow. Upon following his father to his study, Amuro is only handed a new memory circuit for the Gundam. Realizing that his father's fight against the hypoxia had caused his mental state to deteriorate, he asked his father if he still cared for his wife but is quickly shouted at.
In response, Amuro disposes of the memory circuit and buys some food for his father, who hysterically wonders if the memory circuit actually worked. Bidding farewell to his father, Amuro begins traveling on his jeep when a sudden downpour causing him to seek shelter at a nearby house. Meeting Lalah Sune, Amuro becomes bewitched by her when the rain finally ends.
In the following day, the White Base is ordered to leave the city as part of its neutrality protocol, and Amuro is given a chance to speak with his father one more time before departing. On the way, Amuro passes Lalah's house, where his jeep gets stuck in the mud. To his shock, Char and Lalah are the ones that find him and offer to help. While Amuro is aware of Char's identity, Char simply treats Amuro as a young soldier from the opposing side. After being helped out of the mud, Amuro thanks Char and quickly departs, filled with disbelief that Lalah would be at Char's side.
After finally leaving Side 6, the White Base is attacked by a waiting Zeon ship. Though Amuro becomes a prime target, the fleet is forced to retreat due to their attacks reaching the colony's vicinity. Amuro would proceed to down twelve Doms before sinking the ship. With the next battle nearing Side 5, Amuro engages Challia Bull in the Texas Colony and begins to finally awaken to the powers of a Newtype. Amuro would soon drag Bull's unit to a fight away from his team's damaged units before finally destroying Bull's unit.
Amuro's attention is soon caught by Char, now piloting a customized Gelgoog. Their battle is interrupted when Lalah runs into the line of fire, causing Char to rescue her and leave for the Zanzibar instead. Following the excursion at Side 5, Sayla would formally reveal herself as Artesia Som Deikun, the only daughter or Zeon Deikun and the sister of Char. She would also reveal to Amuro and the rest of her brother's belief in the evolution of Newtypes, humans, primarily spacenoids, with enhanced senses and abilities linked together in an almost psychic sense.
In spite of this revelation, Amuro and the others choose to hold Sayla's secret between themselves for the time being as they focus on their next major target; Solomon. Amuro would depart alongside Sleggar's Core Fighter, and despite stiff resistance from Admiral Dozle Zabi the lack of reinforcements sealed the base's fate. Amuro and Sleggar would deal the final blow when Amuro downed the Big Zam after Sleggar sacrificed himself and crashed his Core Fighter to the machine's underbelly. Following Dozle's death, Degwin Zabi would finally choose to negotiate peace with Admiral Revil. While Amuro and the remainder of the Federation stood behind the pair in their meeting, Amuro noticed a large flash that engulfed their forces.
His attempt to warn the crew would be too late as the light, revealed to be Gihren Zabi's Solar Ray, incinerated both Revil and Degwin, and half of the Federation Fleet. As the Federation scrambled its remaining forces to retaliate, Amuro would correctly predict that the Solar Ray needed to have a cooldown period before it would be able to strike again.
Engaging Char's Gelgoog once again, Amuro would connect with Lalah once more, who was now providing Char with support aboard her MAN-08 Elmeth. Despite Amuro's requests for her to stand down, Lalah remained dedicated to protecting Char. Amuro would lock blades with Char, but he would gain the advantage by sacrificing the Gundam's shield to launch a direct attack towards Char's cockpit with the beam saber. To the shock and horror of both, Lalah instantly saw this and took the blow instead dying at the hands of Amuro's attack.
Lalah's abrupt demise shocked both Char and Amuro, and the former immediately lunged at the latter. In spite of his grieving state, Amuro would instinctively lop off the arm of Char's Gelgoog, forcing him to flee. Despite this, Amuro is still stuck in his own regret for striking Lalah down.
During the final battle at A Baoa Qu, Amuro and the rest of the White Base would rally the remains of the Federation Fleet following the Solar Ray attack, and the ship subsequently ground itself on Zeon's doorsteps after using itself as a battering ram to reach the enemy base. While the rest of the crew, save for the pilots who would board their mobile suits, were escaping, Char would arrive with the MSN-02 Zeong to intercept them. Both Hayato and Kai struggled to gain any foothold, and Amuro was forced to shoot his way through the White Base's launch hatch to join the fight, and he and Char would take to space to continue their duel. During which, the Gundam would find itself overwhelmed by the Zeong's INCOM and would lose an arm and its shield in the process. Despite the damage, Amuro begins to catch on to Char's patterns and eventually manages to land several direct blows to Zeong's chest, destroying the body, and forcing Char to flee with just the Zeong's head. Amuro would chase Char into A Baoa Qu itself as the Gundam's head is blown off when Char attacks and hides from above. In response, Amuro uses his senses to read Char's location and successfully hits Char with the Gundam's beam rifle, but the Zeong head also catches the Gundam's leg with its last Mega Particle Cannon.
Unwilling to let Char escape, Amuro takes a pistol and chases Char into the base's armor room. Although Char disarms Amuro, the Zeon officer hands Amuro a rapier and the two begin dueling inside, but Amuro is heavily outclassed and is grazed at the arm. While the pair are fighting, both Sayla's cries, and lingering emotions from Lalah eventually lead to Amuro defeating Char, who was saved from death only by his helmet.
Concluding that Amuro was the victor, Char orders Sayla to take Amuro and leave the base while he would settle matters with the Zabi family. As Sayla and Amuro began fleeing the base after its self-destruct sequence was initiated, the pair were separated by the chaos inside the base. Using his Newtype powers, Amuro sends messages towards Sayla, and the rest of the crewmembers and pilots of the White Base and directs them to each other. Additionally, he would perhaps by fate, be led back to the Gundam, where he ejects the Core Fighter from the mobile suit and barely escapes A Baoa Qu. Kikka is the first to pick up Amuro and helps guide him back to the White Base's lifeboat. Upon reuniting with the others, Amuro apologizes to Lalah as he still has people to return to.
U.C. 0082[]
Amuro Ray's exploitation became popular after the war, and he soon gained the celebrity status among the people, and a target for the Zeon Remnants. One such incident happened in U.C. 0082, when Amuro was invited by Hayato, Fraw and the White Bases orphans to visit Izumo-Taisha, a Japanese cultural heritage site that has connection with the Kobayashi's ancestor. Zeon soldiers of Uragang company loyal to M'Quve had infiltrated the crowd, and even one of them, called herself "Yamada", was their tour guide. Hayato expressed his wish to propose to Fraw and begged Amuro not to go between them [5].
Also, from those same moments, the Zeon remnants made several attempts to assassinate him, but were thwarted by plain-cloth Federation agents who secretly guarded Amuro's life. When the group visited Totoori sand dune, the children were taken hostages by Zeon agents who had been hiding under the sand. In a heroic moment, Hayato used his martial art skill to disable the assassins. The Zeon made a last ditch attempt and started up their replica of the Gyan (also hidden under the sand dune). However, the MS broke down moments after it was revealed. That same night, Amuro and Fraw had a conversation. She told him that instead of taking up the family business, Hayato decided to continue on the military path. On the other hand, Amuro intended to return to Side 7 and help rebuild the colony [6].
Gallery[]
")
")
")
")
")
")
.png "Amuro Ray (Cucuruz Doan's Island).png (1,023 KB)")
References[]
- ↑ Mobile Suit Gundam: The Origin Chapter 41, Char & Sayla, Section VII
- ↑ Mobile Suit Gundam: The Origin Episode 2, Artesia's Sorrow
- ↑ Mobile Suit Gundam: The Origin Episode 3, Dawn of Rebellion
- ↑ Mobile Suit Gundam: The Origin Chapter 1, Activation, Section I
- ↑ Mobile Suit Gundam: The Origin - Amuro 0082 Chapter 1, Amuro 0082, Section I
- ↑ Mobile Suit Gundam: The Origin - Amuro 0082 Chapter 2